

Hey there, fellow gardening and farming enthusiasts! As a supplier of diesel tillers, I've gotten tons of questions about how to adjust the tilling width of these nifty machines. It's a crucial aspect that can make your tilling tasks a whole lot easier and more efficient. So, in this blog, I'm gonna walk you through the ins and outs of adjusting the tilling width of a diesel tiller.
First off, let's talk about why adjusting the tilling width matters. Depending on the size of your garden or field, and the specific task you're working on, you might need a wider or narrower tilling path. For instance, if you're working on a small, tight garden bed, a narrower tilling width will give you more control and prevent you from disturbing the surrounding areas. On the other hand, if you're tilling a large open field, a wider tilling width can save you time and effort.
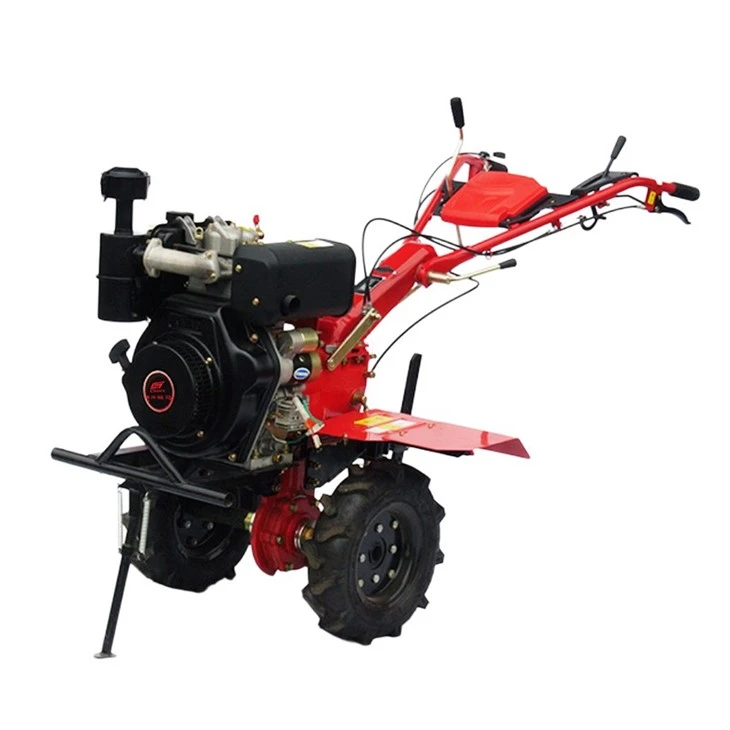
Now, before we dive into the adjustment process, it's important to understand the different types of diesel tillers out there. We offer a range of models, each with its own features and capabilities. For example, our Competitive 8.4HP Mini Tiller Cultivator is a great option for small to medium-sized gardens. It's compact, easy to maneuver, and has adjustable tilling width settings to suit your needs. Another popular model is the 173F Diesel Mini Power 4 Gears Tiller, which is known for its powerful engine and versatile tilling capabilities. And if you're looking for a tiller specifically designed for garden use, our Agro Care Diesel Power Garden Mini Tiller is a top choice.
So, how do you actually adjust the tilling width of a diesel tiller? Well, the process can vary depending on the model of your tiller, but I'll go over the general steps here.

Step 1: Safety First
Before you start making any adjustments to your tiller, make sure it's turned off and the engine is cool. This will prevent any accidental injuries. Also, wear appropriate safety gear, such as gloves and safety glasses.
Step 2: Locate the Adjustment Mechanism
Most diesel tillers have an adjustment mechanism that allows you to change the tilling width. This mechanism can be a lever, a knob, or a set of bolts. Check your tiller's user manual to find out where the adjustment mechanism is located on your specific model.
Step 3: Make the Adjustment
Once you've located the adjustment mechanism, it's time to make the actual adjustment. If your tiller has a lever, you can simply move it to the desired width setting. Some levers may have markings indicating the different width options. If it's a knob, turn it clockwise or counterclockwise to increase or decrease the tilling width. For tillers with bolts, you'll need to loosen the bolts, adjust the position of the tilling tines or blades, and then tighten the bolts back up.
Step 4: Test the Tilling Width
After making the adjustment, start the tiller and test the tilling width on a small area. Make sure the tiller is tilling at the desired width and that the tines or blades are rotating smoothly. If you're not satisfied with the width, you can go back and make further adjustments.
Step 5: Fine-Tuning
Sometimes, you may need to fine-tune the tilling width to get it just right. This can be done by making small adjustments to the adjustment mechanism. Keep in mind that it may take a few tries to get the perfect tilling width for your specific needs.
It's also important to note that the soil conditions can affect the tilling width. If the soil is very hard or compacted, the tiller may not be able to till as wide as it can in softer soil. In these cases, you may need to make some adjustments to the tilling depth or use a different tilling technique.
Another thing to consider is the maintenance of your tiller. Regular maintenance, such as cleaning the tiller after each use, lubricating the moving parts, and checking the tines or blades for wear and tear, can help ensure that your tiller performs at its best and that the tilling width adjustment mechanism works properly.
In addition to adjusting the tilling width, there are other ways to improve the efficiency of your tilling tasks. For example, you can use the right tilling technique, such as overlapping the tilling paths slightly to ensure complete coverage. You can also adjust the tilling depth to suit the type of soil and the plants you're growing.
So, there you have it! That's how you adjust the tilling width of a diesel tiller. I hope this blog has been helpful to you. If you have any questions or need more information about our diesel tillers, or if you're interested in purchasing a tiller, don't hesitate to get in touch with us. We're here to help you find the perfect tiller for your needs and to provide you with all the support and guidance you need to get the most out of your tiller.
Thanks for reading, and happy tilling!
References
- Diesel Tiller User Manuals
- Gardening and Farming Guides